Vendor Setup
The Vendor Setup menu allows users to create vendors and map the vendors to the vendor type created. Once created, users can associate a vendor to retail items.
Perform the following steps to create vendor:
Navigate to Settings à Retail Setup à Vendor Setup.
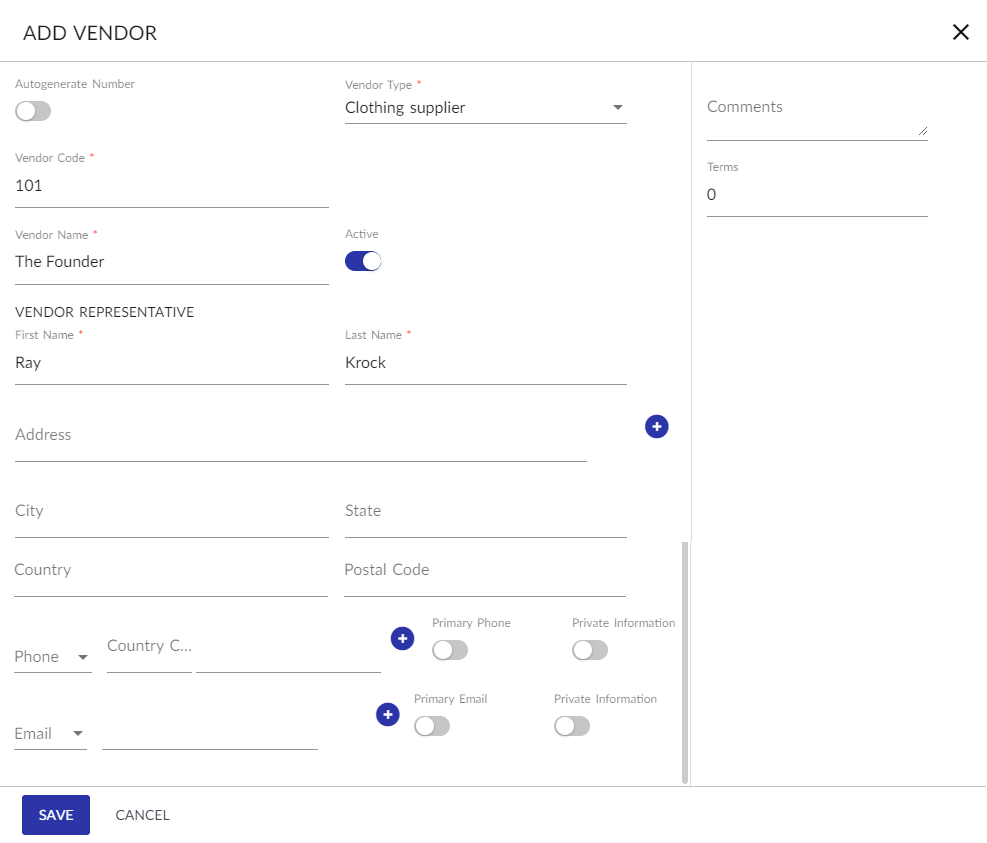
Click Add Vendor. The Add Vendor screen appears.
Refer to the following table and fill in the details.
|
Field |
Description |
|---|---|
|
Autogenerate Number |
When enabled, system auto generates a vendor code for the vendor. |
|
Vendor Type |
A drop-down list consisting of the vendor types created. Users can select an active vendor type to categorize the vendor. |
|
Vendor Code |
A unique code for the vendor. If the Autogenerate Number flag is disabled, users must manually enter the code. |
|
Vendor Name |
A unique name for the vendor. |
|
Active |
When enabled, it indicates that the vendor is active. By default, this flag is set to Yes. |
|
Vendor Representative |
|
|
First Name |
The first name of the vendor representative. |
|
Last Name |
The last name of the vendor representative. |
|
Address |
The residential address of the vendor representative. |
|
City |
The city the vendor representative belongs to. |
|
State |
The state the vendor representative belongs to. |
|
Country |
The country of origin of the vendor representative. |
|
Postal Code |
The zip code of the vendor representative’s location. |
|
Phone |
The type of phone contact, that is, Home, Office, or Mobile. |
|
|
The email address of the vendor. The user must first select the type of email contact, that is, Office or Personal and then enter the email address. |
|
Comments |
The comments for the vendor. |
|
Terms |
The number of days for the payment terms. |
Click Save. The vendor is created successfully.
Users can also perform the following actions in the Vendor Setup screen:
-
Click the Filters option to filter out the selected vendor type and display in the default vendor setup grid. Users can view all the vendors created in the default grid on clicking Reset All option.
-
Click the Edit icon against the preferred vendor record to modify it. A vendor record can be made inactive only when inactive items are mapped to the vendor. The following message is displayed: Operation not Allowed; Vendor has active retail items.
-
Click the Delete icon to delete. On clicking Delete, the following message is displayed: Warning. Are you sure you want to delete the Vendor? The user can either click Yes to continue or No to cancel. If there are any active retail item mapped to the vendor, users cannot delete the vendor record. The following message is displayed: Vendor has active retail items, delete not allowed.
-
Click the Drag icon to reorder the preferred vendor record. Users can search the preferred vendor record by entering the respective vendor code, vendor name, vendor representative, or vendor phone number in the search box provided.